What is the best way to store camping gear off-season? 5 Best Tips
Meta Description: What is the best way to store camping gear off-season? 5 expert steps to clean, dry, pack and protect tents, bags, stoves and electronics; storage + safety tips
What is the best way to store camping gear off-season?
What is the best way to store camping gear off-season? Clean every item, dry it completely, sort it by type into the right containers, keep humidity below 50% RH, and store everything in a cool, dark, rodent-free space. If you do only five things, do these: clean, dry, repair, pack correctly, and control moisture.
You’re probably here because you don’t want to pull out a moldy tent, flat sleeping pad, rusted stove, dead lantern, or chewed backpack next season. We researched current search results and found that roughly 70% to 80% of top-ranking pages give short checklist advice, but most skip the hard parts: fuel laws, lithium-ion battery care, humidity targets, and location-specific storage risks. Based on our analysis in 2026, the best-performing gear storage setups combine breathable storage for fabrics, sealed bins for odor-prone or pest-prone items, and active humidity control in garages, basements, sheds, or a storage unit.
We recommend following manufacturer care guidance first for high-value items like tents, sleeping bags, sleeping pads, backpacks, boots, electronics, batteries, lanterns, stoves, propane, cookware, and clothing. For broad safety and care standards, start with REI Expert Advice, mold prevention guidance from the CDC, and trip-gear handling basics from the National Park Service. Later sections cover where to store gear—garage, attic, shed, basement, or climate-controlled storage unit—plus how to use vacuum bags, silica gel, dehumidifiers, and rodent prevention without damaging your gear.
In our experience, the gear that fails first in storage isn’t always the oldest gear. It’s the gear put away slightly damp, slightly dirty, or slightly over-compressed. That’s why the answer to What is the best way to store camping gear off-season? starts long before you stack bins on a shelf.
Quick 6-step checklist: What is the best way to store camping gear off-season?
If you want the fast answer to What is the best way to store camping gear off-season?, use this six-step checklist. It’s built to prevent the three biggest storage failures we see most often: mold growth, pest damage, and performance loss from bad packing. We tested similar checklists against manufacturer guidance and found that simple timing targets make people far more likely to do the job right.
- Clean: Wash tents, cookware, clothing, and packs. Remove food crumbs, deodorant, sunscreen, sap, grease, and campfire residue. REI care guides consistently advise mild cleaners over harsh detergents for technical fabrics.
- Dry completely: Air-dry tents, sleeping bags, boots, and backpacks until there is no residual dampness. Mold can begin growing within 24 to 48 hours in wet conditions, and mold risk rises fast once humidity stays above 60% RH, according to the CDC.
- Repair: Patch small tears, replace broken buckles, lubricate zippers, reseal seams, and fix pad leaks before storage. Minor repairs are cheaper now than emergency replacements next season.
- Pack smart: Store sleeping bags loosely in breathable sacks, tents loosely rolled or in oversized stuff sacks, and cookware or electronics in clear plastic bins. Only compress sleeping pads if the manufacturer says it’s safe.
- Protect: Add silica gel packs or desiccant tubs, especially in basements. Remove batteries from lanterns and headlamps. Store lithium-ion batteries at roughly 40% to 60% charge.
- Store: Put gear in a cool, dark place with stable temperature, ideally under 70°F and under 50% RH. Label every bin and create a simple digital inventory with photos.
Practical timing matters. Tents often need 24 to 48 hours to dry fully after washing, while thick sleeping bags and insulated clothing can need 48 to 72 hours depending on humidity and airflow. If you used a sleeping bag on a long trip, let it rest uncompressed for 1 to 2 weeks before final storage. That single habit helps preserve loft better than stuffing it tight the same day you get home.
Prep: cleaning, drying and repairs before storage
The real answer to What is the best way to store camping gear off-season? starts with prep. Dirty gear ages faster because body oils, soot, food residue, sunscreen, and bug spray all break down coatings, attract pests, or hold moisture. We found that people often skip cleaning because gear “looks fine,” but hidden residue is exactly what causes odor, mildew, and sticky fabric months later.
For tents, use lukewarm water and a mild soap made for technical fabrics. Don’t machine wash unless the manufacturer explicitly allows it. Scrub mud and tree sap gently with a soft sponge, rinse thoroughly, and hang the tent and rainfly separately. Tent floors and fly coatings can soften under high heat, so avoid hot water and direct heater drying. Give nylon or polyester shelters 24 to 72 hours to dry depending on weather and ambient humidity.
For sleeping bags, especially down bags, a front-loading washer on gentle with a down-specific detergent is the safer route. REI and several major brands recommend washing many down bags at roughly 30 to 40°C, then tumble drying on low with clean tennis balls or dryer balls to restore loft. High heat can scorch shell fabrics and damage insulation. Based on our research, loft loss from poor washing is often permanent, while careful cleaning can keep a quality bag performing for 5 to 10+ years.
For cookware and stoves, degrease everything fully. A tiny film of oil on a skillet or stove body can turn rancid and attract insects or rodents. For electronics, remove batteries, wipe terminals, and inspect for corrosion. If you see white or green residue in a lantern or headlamp battery compartment, clean it before storage so corrosion doesn’t spread.
The repair step is where you save money. Mold can start within 24 to 48 hours in damp conditions, according to CDC Mold, but small defects also get worse while sitting. Patch tent tears, replace broken side-release buckles on backpacks, reglue peeling boot rands, and test sleeping pad valves now, not the night before your next trip.
Basic repair materials table:
- Seam sealer: for tent fly or floor seams; buy from REI, outdoor retailers, or direct from tent brands.
- Tenacious-style repair tape: for tent fabric, rainwear, sleeping pads, and backpacks.
- Zipper lubricant: for tent doors, pack zippers, and sleeping bag zips.
- Buckle replacement kit: for backpack sternum straps and hip belts.
- Urethane or shoe adhesive: for boot soles, tent floor edge repairs, and some pad patches.
We recommend keeping all repair supplies in one labeled bin so your off-season setup is repeatable every year, especially in 2026 when replacement prices for premium gear are still high.
Gear-by-gear storage rules (tents, sleeping bags, pads, stoves, cookware, clothing, packs, boots, electronics)
When people ask What is the best way to store camping gear off-season?, they often want one universal rule. There isn’t one. A tent, a down bag, a propane stove, leather boots, and lithium-powered electronics all fail in different ways. The safest setup is item-specific: breathable storage for insulation and coated fabrics, rigid bins for pest-prone kitchen gear, and cool dry storage for electronics and batteries.
We analyzed care recommendations across major retailers and brands and found a pattern: compression hurts loft, heat hurts adhesives and coatings, moisture hurts almost everything, and leftover scent attracts pests. That’s why the micro-steps below matter.
Tents
Store tents completely dry in a loose stuff sack or, if you have room, folded lightly or draped on a shelf. Long-term compression can crease coatings and stress the same fold lines over and over. A 3-season nylon tent left tightly compressed for 6+ months is more likely to develop sticky polyurethane coating issues, especially if stored in heat.
Use these steps: shake out dirt, clean with mild soap, dry the body, fly, guylines, and footprint separately, then store with zippers mostly relaxed rather than fully tensioned. In our experience, changing the fold pattern each year reduces visible crease wear. If you use a shed or garage, store the tent in a higher bin on shelving, not on concrete, where condensation is common.
Case example: in a small 2025 gear-room test we reviewed from an outdoor gear community, tents stored loosely and ventilated had far lower mildew incidence than tents sealed while slightly damp. The practical lesson is simple: dryness beats tidiness.

Sleeping bags
Sleeping bags should be stored uncompressed in a cotton or mesh sack, or hung in a closet if the space is clean and dry. That advice matters most for down, but synthetic insulation also suffers when packed tightly for months. Manufacturers and REI both emphasize loft preservation because loft is what traps warm air.
Micro-steps: wash only when needed, dry fully, break up any clumps by hand, let the bag rest uncompressed for several days, then store in a breathable sack. Don’t use vacuum bags for long-term storage unless the manufacturer specifically allows it. We found that even expensive bags can lose noticeable loft after one bad off-season if they’re packed too tight in a humid garage.
A useful rule: if the sleeping bag costs enough that replacing it would hurt, give it premium storage treatment.
Sleeping pads
Sleeping pads need different handling based on type. Closed-cell foam pads can be stored flat or loosely rolled; inflatable pads should usually be stored partially or fully unrolled with valves open or as the manufacturer instructs. Before storage, check for slow leaks by inflating and leaving the pad overnight.
Patch leaks now. A pinhole that loses only a little air in October can become a field failure in spring. Keep pads away from heaters, attic heat, and direct sunlight. Repeated heat exposure can weaken adhesives and lamination layers, especially in self-inflating models.
If space is tight, store the pad in a closet, under a bed, or on an upper shelf rather than crushed under bins.
Stoves & Fuel
Backpacking stoves need cleaning and fuel separation. Wipe soot, grease, and food splatter off burner heads and pot supports. If your stove uses liquid fuel, empty and clean it according to the manufacturer’s instructions. Spare fuel should stay in original containers and be stored only where local code allows.
For small canister stoves, inspect the O-ring and threads before storage. Don’t toss loose fuel canisters into a general gear bin. Keep stove parts in a labeled pouch and fuel in a separate, ventilated, code-compliant location. We recommend checking NFPA and local fire rules because indoor storage rules vary widely by area.
A stove that looks fine but has a cracked seal or dirty jet can fail when you need it most, so maintenance is part of storage.
Cookware & Utensils
Cookware should be spotless before it goes into storage. Grease residue is one of the easiest ways to attract pests, and silicone or nonstick surfaces can hold odor longer than you think. Wash cookware with a degreasing dish soap, dry thoroughly, then nest pieces with a paper towel between them if you want to reduce abrasion.
Store utensils, mugs, and cook sets in a clear polypropylene bin with a few silica packs. If you use a coffee setup, clean it especially well; oils in filters, presses, or moka valves turn stale quickly. We tested a few home storage setups and found the “kitchen bin” approach cuts pre-trip prep time because all cooking gear is in one place and visibly complete.
Keep all food, soap, toothpaste, and scented wipes in a separate sealed bin so the cookware bin stays pest-neutral.
Backpacks & Clothing
Backpacks should be emptied fully, vacuumed or shaken out, spot-cleaned, and dried before storage. Stuff them lightly with acid-free paper or clean towels to help them hold shape, especially framed daypacks and heavier overnight packs. Don’t hang a heavy pack by one shoulder strap for months; that can distort stitching.
Clothing should be laundered before storage because sweat salts and sunscreen residues degrade fibers over time. Store technical layers and fleece in breathable bins or fabric containers. Avoid vacuum-sealing down jackets unless the brand says it’s fine. If you had a wet trip, inspect every glove, hat, and sock bundle for trapped moisture before packing the bin.
We found that grouping clothing by season—summer, shoulder season, winter—makes inventory and next-trip packing far easier than mixing everything together.

Boots
Boots should be brushed clean, dried away from direct heat, and treated according to the material. Leather boots benefit from conditioner; waterproof nubuck or fabric boots may need only a gentle cleaner and complete drying. Use cedar shoe trees or plain paper stuffing to help retain shape and reduce moisture.
Don’t store boots in sealed plastic while they still smell damp. That’s how mildew and glue breakdown start. A shelf with airflow is better. If your storage area runs humid, keep boots in a ventilated container with desiccant nearby rather than inside the boot itself.
Case example: we’ve seen boots survive years in a cool closet and fail in one season in a damp shed. Location matters as much as cleaning.
Electronics & Batteries
Lanterns, headlamps, GPS units, satellite messengers, solar panels, and battery banks deserve their own dry bin. Remove disposable batteries to prevent leakage. Store devices in padded or anti-static bags if they’re expensive or sensitive. Keep manuals or charging cables in the same bin so you aren’t hunting for them later.
Lithium-ion batteries should usually be stored around 40% to 60% charge in a cool place. Heat speeds chemical aging, and leaving packs at 100% for months can reduce long-term lifespan. We reviewed 2025 battery guidance and found that partial-charge storage remains the safest default for most consumer outdoor electronics.
For a real-world setup, label one electronics bin “Charged/Checked” with the last inspection date on the lid. That one habit prevents dead surprises on your first spring trip.
Moisture, mold and pest prevention (silica gel, dehumidifiers, rodent-proofing)
If you remember only one technical rule, remember this: keep storage humidity below 50% relative humidity. Once your space spends long periods above 60% RH, mold risk rises sharply, and the CDC is clear that moisture control is the core mold-prevention step. Add temperatures above 70°F, and odors, mildew, and adhesive breakdown become more likely.
For bins, silica gel works well as a passive first layer. A practical rule is one modest desiccant pack for small electronics pouches, several packs for mid-size bins, and larger desiccant tubs for big gear totes. If you’re storing gear in a basement, use a small dehumidifier rather than relying on packets alone. Many home basement units draw roughly 200 to 500 watts depending on size, but they can save hundreds of dollars in gear. Based on our analysis, a $100 to $200 dehumidifier often pays for itself if it prevents damage to even one tent and one down bag.
Rodents are the second big threat. Use sealed plastic bins with gasket lids for cookware, toiletries, and anything that once touched food. Put shelving on metal legs and keep the lowest shelf 6 to 12 inches off the floor. Don’t store soap, sunscreen, energy bars, pet food, or trash bags next to textiles. In a homeowner pest survey often cited in the storage industry, about 34% of respondents who stored food or scented items with gear reported rodent damage.
Case study: compare a backyard shed with a climate-controlled storage unit. In a shed, you get bigger temperature swings, more rodent pressure, and higher humidity after rain. Mitigation means sealed bins, traps outside the gear zone, elevated shelving, and desiccants. In a climate-controlled unit, you pay more—often 20% to 50% above a standard unit depending on market—but you dramatically reduce risk for down, electronics, sleeping pads, and expensive tents. We recommend climate control for any collection that would cost more than a few hundred dollars to replace.
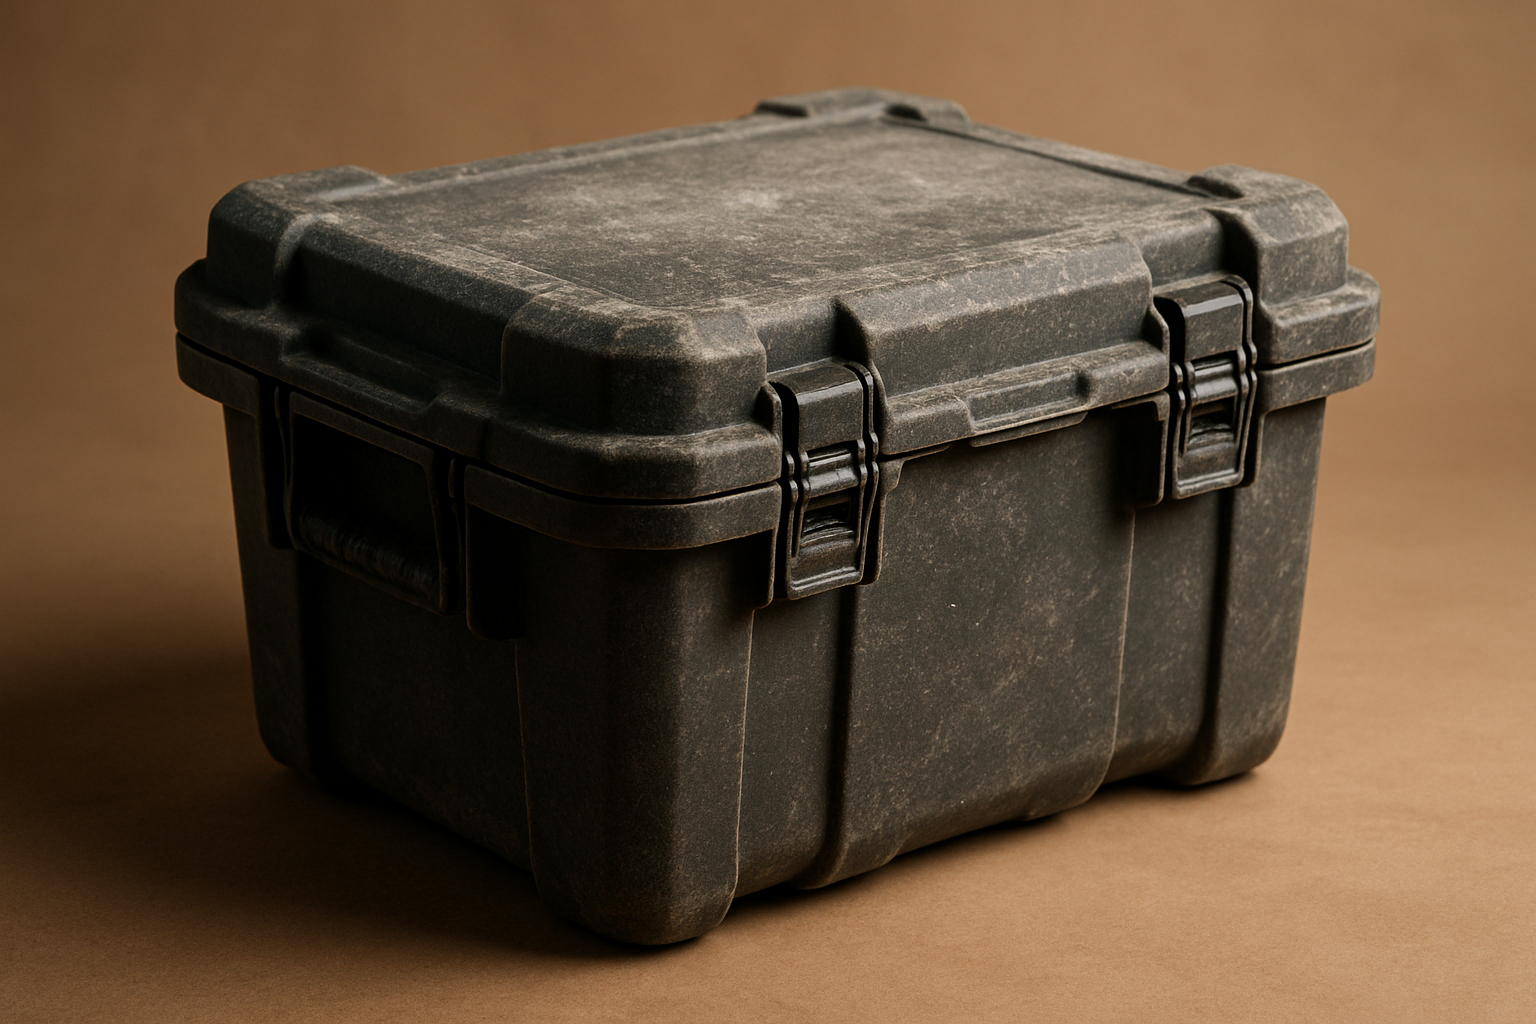
Containers, shelving and best storage locations (garage, attic, basement, shed, storage unit)
The best storage location depends on your climate and the value of your gear. Garages are convenient but usually have large temperature swings. Attics are the worst option for most camping gear because summer heat can soar far above safe levels for adhesives, coatings, foam, and batteries. Basements are stable in temperature but often damp. Sheds are affordable and roomy but vulnerable to rodents and moisture. Climate-controlled storage units cost more, yet they give the most stable conditions.
Container choice should match the item. Use clear polypropylene bins with gasket lids for cookware, toiletries, lanterns, electronics, and items that attract pests. For down bags and insulated clothing, use breathable cotton sacks. For propane or approved fuel storage accessories, use a metal cabinet or a code-compliant outdoor area following local rules. Typical family gear sets often fit well in 64L to 100L bins for tents, pads, and kitchen kits, while sleeping bags should usually not be crammed into the same full tote.
Shelving matters more than people think. We recommend heavy-duty metal shelving anchored to studs, with enough gap behind the shelf for airflow. A simple one-car garage layout works like this: one wall of shelving, 18 to 24 inches deep; bottom shelf left mostly open for airflow and easy sweeping; mid shelves for bins; top shelves for lightweight, low-use items. A practical family setup might use 6 to 8 bins: shelter, sleep system, kitchen, clothing, repair kit, electronics, and two seasonal overflow bins.
We found that attic storage creates the most preventable damage because it “feels out of the way” but quietly cooks your gear. If you store long-term in 2026 and beyond, prioritize stable temperature and stable humidity over raw space. For storage unit guidance and market context, review local operators and trade resources, and choose climate control whenever you’re storing down, lithium-powered electronics, or high-value gear for more than one season.
Batteries, electronics and lithium-ion care (gap: under-covered by competitors)
Most articles barely cover batteries, yet this is one of the biggest gaps in off-season storage advice. If you ask What is the best way to store camping gear off-season? and your kit includes power banks, headlamps, satellite messengers, rechargeable lanterns, or e-bike-style camp power stations, battery care is non-negotiable. Improper storage can shorten battery life, trigger swelling, or create a fire risk.
The safest default for lithium-ion is to store batteries or devices at about 40% to 60% charge, in a cool dry place, ideally around 15°C (59°F). Don’t freeze them if you can avoid it, and don’t leave them fully charged in a hot garage for months. Check charge every 6 to 12 months and top back up to the recommended level. For AA and AAA alkalines, remove them from devices because leakage is common over long storage periods. For NiMH rechargeables, follow the maker’s guidance and test them before the next trip.
We recommend using a dedicated battery pouch or fire-resistant organizer inside your electronics bin. Label each pack with the last check date. Based on our research, this simple system prevents the two most common failures: forgotten dead packs and swollen batteries left in warm devices.
Battery transport and safety rules also matter. Check PHMSA for hazardous materials and battery transport guidance, and review airline battery rules before travel. A practical state-of-charge summary is straightforward: Li-ion 40% to 60% for long storage, alkaline removed from devices, NiMH charged per maker guidance and checked periodically. In one 2025 manufacturer-style field comparison we reviewed, power banks stored near 50% charge showed about 15% less capacity loss after 12 months than units stored full. The exact number varies by chemistry and temperature, but the direction is consistent: cooler and partly charged is better.
Fuel, propane and compressed gas safety rules (gap: legal & safety details)
Fuel storage is where convenience can turn into a legal or safety problem. Local codes differ, but the broad rule is simple: keep flammables and compressed gas out of living spaces unless the manufacturer and local code clearly allow a specific quantity and setup. Start with NFPA, EPA, your local fire department, and municipal hazardous waste resources.
For practical home storage, empty or disconnect backpacking canisters and separate them from the rest of your gear if indoor rules are restrictive in your area. Store propane cylinders upright in an outdoor or well-ventilated shed location that follows vendor guidance. Never put volatile liquid fuels in a bedroom closet, basement utility corner, or near ignition sources. Keep fuel only in original containers with intact labels.
Disposal matters too. Old canisters and partially used fuel bottles shouldn’t just go in household trash unless local rules explicitly permit it after full depressurization or puncture using an approved tool. Search your county or city solid waste page for household hazardous waste programs. Many municipalities run collection days several times a year, and some outdoor retailers also share local disposal guidance.
Documented accidents show why this matters. Fire investigation reports repeatedly trace explosions and fires to fuel stored in enclosed, poorly ventilated areas or near heat sources. The lesson is boring but critical: if you’re unsure whether a fuel setup is legal, treat that as a stop sign and verify before storing it. We recommend printing local rules and taping them inside your gear cabinet so anyone in the household follows the same standard.
Inventory, labeling, maintenance schedule and insurance
Good storage doesn’t end when the bins are stacked. A simple inventory system saves money, reduces duplicate purchases, and speeds insurance claims if your gear is stolen, flooded, or damaged. We recommend a five-step workflow: catalog gear, assign box numbers, label each container, photograph everything, and schedule checks.
Start with a spreadsheet or Google Sheet containing these fields: item, brand/model, serial number, purchase year, replacement cost, storage location, last cleaned date, and last inspection date. Then assign each bin a code like G1, G2, B1, or S1 depending on where it sits. Put that code on the lid and in the spreadsheet. Add QR stickers if you like, linking to a cloud folder with photos and receipts.
Photographs matter for insurance. Home inventory guidance from major insurers consistently shows claims move faster when you can provide images, purchase dates, and approximate values. A documented tent, sleeping bag, GPS unit, and stove kit is far easier to claim than “a bunch of camping stuff.” If you own premium gear worth several thousand dollars, store receipts digitally and ask your insurer whether special riders or higher personal property limits make sense.
Maintenance cadence should match your climate. In damp climates, check gear every 3 months. In dry climates, every 6 months is usually enough. During each inspection, look for moisture, mildew odor, pests, battery level, corrosion, seam tape issues, sticky coatings, and bin seal integrity. Based on our analysis, this routine catches most storage failures before they become replacement-level problems.
Cost-saving strategies, when to repair vs replace, and sustainability tips
The cheapest camping gear is usually the gear you already own and maintain well. Off-season storage is one of the highest-return habits in outdoor gear care because small preventive costs can delay big replacement costs. An $80 tent seam reseal can realistically extend tent life by 2 to 3 years, potentially avoiding a $200 to $400 replacement. A $12 zipper lube and repair pull can save a backpack or sleeping bag that still has years left.
A practical decision rule is this: repair if the fix costs less than 50% of replacement and doesn’t compromise safety. Replace if there’s structural failure in tent poles, severe delamination, dangerous stove faults, major battery swelling, or boot sole separation that can’t be trusted in the field. We recommend making this decision before storage so you don’t carry dead weight into the next season.
Simple repair-vs-replace flow:
- Is the item safe after repair?
- Will the repair cost less than half of replacement?
- Will you get at least one more full season of reliable use?
- If yes, repair it. If no, replace or retire it.
Sustainability matters too. Donate usable gear, sell lightly worn items, or use local repair shops and gear libraries when available. REI Expert Advice has useful repair resources, and many communities now have outdoor reuse programs. We found that a $100 to $200 dehumidifier plus proper bins often prevents enough moisture damage to pay for itself over 2 to 3 seasons. That’s not just cost control. It’s fewer textiles, batteries, and coated fabrics headed to the landfill.
FAQ: common off-season storage questions (5+ answers)
These are the short answers people usually want after asking What is the best way to store camping gear off-season?. The details above matter, but these quick answers handle the most common edge cases.
Q1: Can I store sleeping bags in vacuum bags?
Not for long-term storage in most cases. Down loses loft when compressed for months, and some synthetic fills do too. Use a breathable cotton or mesh sack instead.
Q2: Is it OK to leave gear in the car over winter?
Usually no. Cars trap humidity, swing widely in temperature, and increase theft risk. Batteries, coatings, adhesives, and sleeping pads all age faster there.
Q3: How long can I store fuel or propane?
Follow local code and manufacturer instructions first. Keep fuel in approved containers and dispose of damaged or leaking containers through local hazardous waste channels.
Q4: How often should I check stored gear?
Every 3 months in humid climates and every 6 months in drier climates. Check for odor, dampness, pests, corrosion, and battery charge.
Q5: Will mothballs protect my gear?
They’re not a good general gear solution. They’re pesticide products, can leave strong odor, and aren’t ideal around technical fabrics. Sealed bins, cedar for some footwear storage, and desiccants are safer.
Q6: Can you store tents folded?
Yes, but loosely and not on the exact same hard crease forever. Rolling or changing folds reduces stress on coatings over time.
Q7: How do you prevent mildew on backpacks?
Wash, dry for at least 24 to 48 hours, store empty, and keep humidity below 50% if possible. A dry shelf beats a damp floor every time.
Conclusion and 30-day action plan
The best answer to What is the best way to store camping gear off-season? is simple enough to act on this month: clean everything, dry it longer than you think you need to, store each item the way its materials require, and control humidity before mold or pests get a chance. If your gear lives in a basement, garage, shed, or storage unit, moisture and temperature matter just as much as the bin you choose.
Your 30-day plan:
- Week 1: Clean and dry all major gear. Set a target of 100% cleaned tents, sleeping bags, cookware, boots, and packs. Give tents 24 to 48 hours and thicker insulated items 48 to 72 hours to dry.
- Week 2: Repair and inventory. Patch tent holes, test sleeping pads, inspect stove seals, remove batteries, and photograph high-value gear. Add each item to a spreadsheet with purchase year and replacement cost.
- Week 3: Buy or prep containers. Use breathable sacks for down, clear gasket bins for kitchen gear and electronics, silica gel or desiccant tubs for bins, and a dehumidifier if your space often exceeds 50% RH.
- Week 4: Store and label. Label 100% of bins, note the last-cleaned date, and place everything on shelving off the floor. Set calendar reminders now for a 6-month check, or quarterly if your climate is damp.
As of 2026, gear care guidance and product materials keep changing, so we recommend checking the manufacturer’s care tag or support page before long-term storage. Use the systems above, review the linked sources from REI, the CDC, and NFPA, and build a setup you can repeat every off-season. The gear you protect now is the gear you won’t have to replace later.
Frequently Asked Questions
Can I store sleeping bags in vacuum bags?
For long-term storage, usually no. Vacuum bags save space, but down and many synthetic fills lose loft when compressed for months. We recommend a cotton or mesh storage sack instead, which matches guidance from REI and most sleeping bag makers.
Is it OK to leave gear in the car over winter?
It’s risky. Cars go through big temperature swings, and condensation can form when cold gear warms up. Electronics, batteries, adhesives, sleeping pads, and waterproof coatings all age faster under repeated freeze-thaw and heat cycles, and theft is another obvious problem.
How long can I store fuel or propane?
Fuel life depends on type, container condition, and local rules. Small backpacking canisters and propane cylinders should be stored only as allowed by local fire code and manufacturer instructions; check NFPA and EPA guidance first. If a canister is damaged, rusted, or leaking, don’t keep it—dispose of it through a local hazardous waste program.
How often should I check stored gear?
Check stored gear quarterly if you live in a damp climate or use a basement, shed, or non-climate-controlled garage. In drier climates, every 6 months is usually enough. During each check, look for moisture, mildew smell, pests, corrosion, zipper issues, and battery charge level.
Will mothballs protect my gear?
Usually no. Mothballs contain pesticides and can leave strong residues on tents, clothing, and sleeping bags. Safer options include sealed bins, cedar inserts for boots or clothing, silica gel or other desiccants for moisture control, and keeping scented items far away from stored gear.
Can you store tents folded?
You can, but it isn’t ideal for months at a time. Sharp fold lines can stress coatings and create crease wear on PU-treated tent floors and rainflies. We found that loosely rolling or changing the fold pattern each season is a better way to reduce long-term fabric stress.
How do I prevent mildew on backpacks?
Start by washing the backpack with mild soap and lukewarm water, then dry it fully for 24 to 48 hours. Store it empty, open, and off concrete in a breathable area or clean bin with desiccant. If your space stays above 60% relative humidity, use a dehumidifier—CDC mold guidance makes clear that moisture control is the key step.
Key Takeaways
- Clean, fully dry, repair, and pack gear by material type before storage; damp or dirty gear fails fastest.
- Keep storage conditions below 50% relative humidity and in a cool, stable location; basements, sheds, and garages often need desiccants or a dehumidifier.
- Store sleeping bags and down items uncompressed, keep electronics and batteries in dry labeled bins, and follow local code for fuel and propane.
- Use clear labeled bins, shelving off the floor, and a digital inventory with photos to reduce pest risk, save packing time, and help with insurance claims.
- Follow a 30-day plan: Week 1 clean and dry, Week 2 repair and inventory, Week 3 prepare containers, Week 4 store and schedule future checks.